
How Foam Is Made
Before going through the process of making different designs from foam, it is helpful to take a look at how we can create foam in the first place.
Foam starts as what is known as raw beads. These tiny plastic pellets can expand up to 40 times their size. The foam expands when put in a steam chamber where heat is applied. Expanding the pellets allows pentane gas to escape from inside. Air then slips inside the pellets, which inflates them further.
Once the pellets become bloated, they form into little balls. They are then put into a bag so they will be ready for the next part of the process. In the next step of the process, the balls, known as BBs, are placed into a block mold machine. The BBs are then put into the hopper to make them as dense as possible until foam forms.
The BBs are steamed and fused to form large blocks of foam. The blocks can be several feet in length. Sometimes the blocks may be as long as 24 ft., can be surprisingly wide, and as heavy as 3 lb per cubic foot. However, they can also be molded into lesser densities if needed. Large blocks of foam can weigh as much as 900 lbs.
The large blocks are usually stored until they are ready for use. When needed, they can typically be shipped off to get cut into sheet sizes or cut into unique shapes and designs by our team that a commissioner may request. Heated wires can cut the foam easily as the heat melts through the
foam, making this process easier.
Select a Foam
One of the first stages in creating an architectural design out of foam structure is selecting the type of foam you want to use. The foam type depends on what you will be using it for. The most common types of foam are polystyrene foam.
This type of foam is very pliable, and you can mold it into various shapes. It comes in huge blocks and smaller ones as well. You can put metal rods, PVC fives, and even dowels inside this foam. It has a strong enough density to be pliable while being sturdy at the same time.
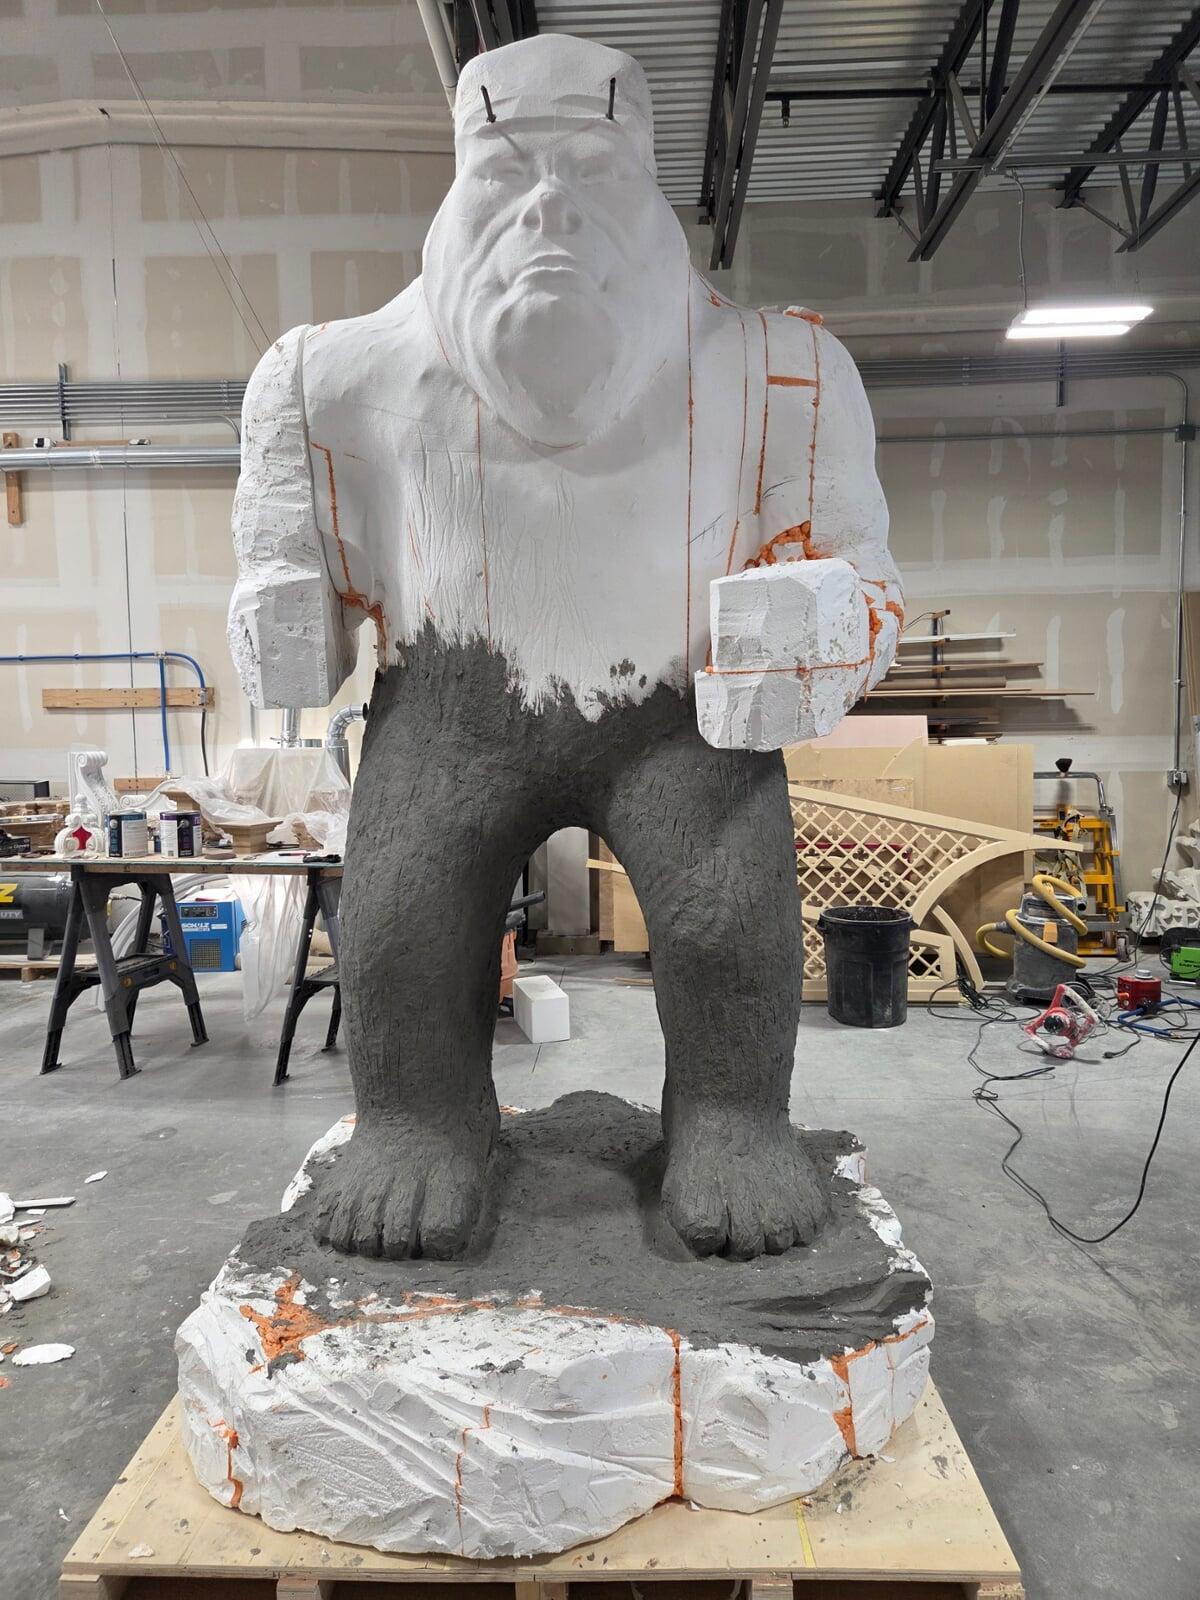
Sculpting the Foam
The second stage in the entire process comes when you start sculpting the foam. During the sculpting process, you can form the foam into the shape you desire. Sculpting can be time-consuming, especially because we create many unique shapes for different needs, but our team of experienced crafters is ready to take on any challenge.
You can use a grid system before beginning the sculpting process in the foam. While using this grid system to create a free-hand drawing on the foam or for a more precise image, you can use a projector to send a lighted picture from a 3D model to the foam. This allows the foam creators to trace the pattern of your designs directly onto the foam.
You will then need to start cutting out your design choice. We can use many tools to cut foam, including electric knives, die grinders, and hand saws.
Making sure to choose the most suitable cutter for the foam you've chosen and the design being used is essential if we want the sculpting of the design to be as smooth as possible.
Apply Texture
The second stage in the entire process comes when you start sculpting the foam. During the sculpting process, you can form the foam into the shape you desire. Sculpting can be time-consuming, especially because we create many unique shapes for different needs, but our team of experienced crafters is ready to take on any challenge.
You can use a grid system before beginning the sculpting process in the foam. While using this grid system to create a free-hand drawing on the foam or for a more precise image, you can use a projector to send a lighted picture from a 3D model to the foam. This allows the foam creators to trace the pattern of your designs directly onto the foam.
You will then need to start cutting out your design choice. We can use many tools to cut foam, including electric knives, die grinders, and hand saws.
Making sure to choose the most suitable cutter for the foam you've chosen and the design being used is essential if we want the sculpting of the design to be as smooth as possible.
Finish Your Project
The second stage in the entire process comes when you start sculpting the foam. During the sculpting process, you can form the foam into the shape you desire. Sculpting can be time-consuming, especially because we create many unique shapes for different needs, but our team of experienced crafters is ready to take on any challenge.
You can use a grid system before beginning the sculpting process in the foam. While using this grid system to create a free-hand drawing on the foam or for a more precise image, you can use a projector to send a lighted picture from a 3D model to the foam. This allows the foam creators to trace the pattern of your designs directly onto the foam.
You will then need to start cutting out your design choice. We can use many tools to cut foam, including electric knives, die grinders, and hand saws.
Making sure to choose the most suitable cutter for the foam you've chosen and the design being used is essential if we want the sculpting of the design to be as smooth as possible.
Foam Designs
Foam designs come from humble beginnings. They start in the shape of little foam balls and expand through processing. The fact that it is so versatile and pliable is one of the main reasons why it is the favorite tool of architects and construction workers.
You can mold foam into almost any shape or design a person can imagine. It is up to the artist and the architect to decide on their vision.
Designers can be as creative as they like when working with foam, as this is one of the few construction materials we can shape into just about any kind of design possible. It is non-toxic and is usually among the more affordable construction materials available.
The team at MYTHODIUM can create fantastic foam sculptures perfectly suited for your themed environments. Get in touch with us now to place a custom order.
